A few of my favourite things: Tools that may make your job easier
by charlene_voisin | February 1, 2014 9:00 am
By Mark T. Cartwright
 [1]
[1]Every professional has tools and techniques they consider indispensable to their trade. The world of gemmology and jewellery appraisal is somewhat unique in that many of us are left to figure these out for ourselves.
One of the many great things about belonging to a variety of organizations is the ability to learn from more experienced peers with different backgrounds and training. Some of us have or have had mentors to guide us, sharing the various tips and techniques they’ve learned over the years; some of us have been fortunate enough to find ourselves the mentor. I feel a special obligation to my teachers to pass along some of the things I’ve learned that I consider a vital part of my practice. For some readers, this will be new information, for others, perhaps not. I don’t claim to have originated any of the things I’ll be sharing, and if I present these ideas poorly, I trust my teachers will excuse my lack of art.
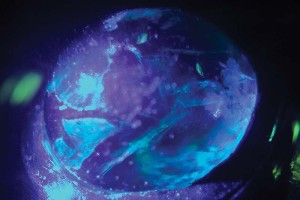
Although deep within the emerald, the yellowish-white fluorescence caused by the near-UV laser’s intense beam can reveal the extent of ‘oiling.’
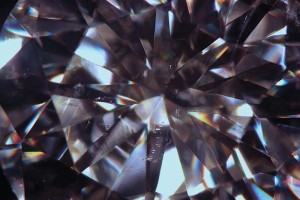
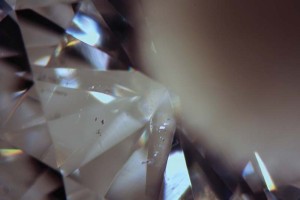
Dark-field illumination—a standard clarity grading environment for diamonds—can have some limitations when dealing with highly dispersive stones and low-relief inclusions.
Seeing clearly
 [2]
[2]A technique I learned more than a decade ago is generally termed ‘water grading’ and is practiced in at least two of the major laboratories. Its primary purpose is to make diamond clarity grading easier and more precise. I also use it (or a variation discussed later in this article) when examining coloured gemstones. The tools needed are easy to acquire and very inexpensive. I couldn’t imagine grading a diamond without using this technique—and I don’t!
You’ll need a small container with a relatively wide mouth and tight-fitting lid, distilled water, dishwashing liquid, and a sponge-tipped applicator. The latter can be found in most stores that sell makeup and are used for applying eye-shadow, lipstick, etc. They come in a variety of sizes, although I prefer the smallest. You can also purchase much more durable and professional-looking applicators from medical supply companies. These feature a 6-in. long handle with a sponge tip about an inch long. The longer handle and more extensive sponge make them very versatile for manipulating a loose diamond in tweezers or microscope stone holder. The makeup applicators each last for a week or so; the more expensive ‘professional’ applicators can last for at least a month with proper care.
To begin, simply fill the container about halfway (it really doesn’t matter if it’s more or less than that) with distilled water and add a drop or two of dishwashing liquid to act as a ‘wetting agent.’ Since diamonds are hygroscopic, the water beads up on the surface without the dishwashing liquid. If you add too much, you may end up with annoying little bubbles or a soap film on the stone’s surface; not enough, and the water’s surface tension won’t be sufficiently broken to prevent beading. Once the solution has been made, it’s simply a matter of wetting the sponge, drawing it gently across the container’s rim to remove excess liquid, and then ‘painting’ the stone’s surface while examining it under the microscope.
If you’ve never used this technique, I’m sure you’ll be startled by the view inside the diamond. It’s as though the stone’s surface disappears, along with any dust; the water seems to act as an auxiliary lens.
 [3]
[3]It was several years after initially learning this grading technique that I was taught some of the subtleties of its use. As the sponge is drawn across the diamond’s crown, it is reflected in the pavilion. Against the light-coloured reflection, inclusions tend to appear dark, while dust or other objects on the pavilion surface disappear or appear light. Since we work primarily with mounted stones, cleaning can be problematic and this technique can significantly enhance our ability to differentiate inclusions from debris on the stone. Additionally, feathers reaching the crown’s surface will sometimes become reflective as the sponge is drawn to the opposite side of the stone.
When this technique is used to examine coloured gemstones, the water helps lessen the appearance of scratches and surface abrasion. When the gem is severely abraded, I may substitute a more viscous liquid with a higher refractive index (RI). Water’s RI is approximately 1.33, although the addition of the dishwashing liquid may alter that number slightly. Most common cooking oils, such as corn, canola, olive, etc., have refractive indices in the range of 1.44 to 1.48. While not a large numerical difference in RI, the higher indices significantly increase the effectiveness of the oils in reducing the visibility of surface abrasion. I usually start with the water solution because it is easily cleaned from the stone. However, if it doesn’t provide the necessary visibility, I switch to a higher RI liquid. If cooking oil is insufficient, benzyl benzoate is non-toxic, has a mild odour, and an RI of approximately 1.567. It is also sold under the trade name, ‘Refractol.’ This is, to my knowledge, the highest RI available in a non-toxic liquid and I’ve used it to great advantage for wet grading and when immersion microscopy was necessary. Of course, wet grading is always most effective with proper illumination.
Let there be light(s)
 [4]
[4]To be most effective at our jobs, having access to a variety of types of lighting environments is vital. We’re all familiar with dark-field illumination and its ‘opposite,’ light-field illumination. While important and useful, they are just the tip of the iceberg, so to speak. In my practice, I tend to use pinpoint fibre-optic light, polarized, and diffused lighting resources at least as much as dark-field. I recently acquired a small, but powerful 405nm laser pointer that I’m discovering has many important uses.
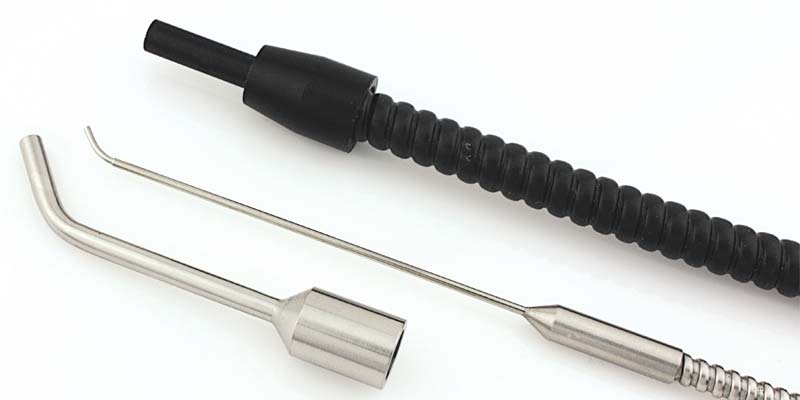
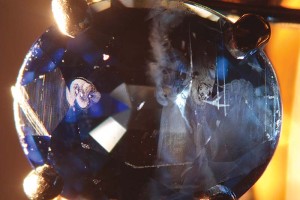
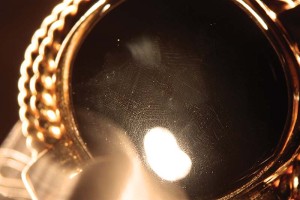
The limits to our ability to examine mounted stones can have a significant impact on the accuracy of our grading. For example, closed-back settings can make dark-field illumination virtually impossible. Fibre-optic lighting with a pinpoint adapter can allow us to direct an intense beam horizontally between the prongs. One can simulate the ‘shadowing’ technique by drawing the light beam across a prong. Direct horizontal illumination can make small pinpoints, clouds, and other inclusions appear in high relief. Combined with shadowing, pinpoint fibre-optic examination can make glass filling, oiling, growth lines, polish lines, colour zoning, and other subtle attributes of coloured gemstones more visible. If one doesn’t have access to a fibre-optic light and pinpoint adapter, a small, single LED penlight also works well when it is narrow enough to be placed precisely.
 [5]
[5]My preference to see growth and zoning in coloured gemstones is a special tool I make with a white diffusion filter on one side of a glass slide and a polarizing filter on the other. The tool’s diffuser side is invaluable for detecting colour zoning and growth characteristics in coloured gems and coloured diamonds. When used as a polarizing filter, dichroic colours can be detected, along with features visible with the diffuser. A polariscope can be created with a second, transparent polarizing plate to produce a polarizing microscope. Polarizing microscopy allows one to ‘type’ diamonds based on their internal strain, detect growth patterns in diamonds and gemstones, find and analyze the optic axis of gems, and see otherwise invisible attributes that can be crucial for gem identification.
My newest ‘toy’ is a powerful near-ultraviolet laser pointer. It is extremely important to wear protective eyewear when using this or any other laser, due to the very real danger of damage to one’s eyesight. A laser operates at essentially a single wavelength of light and with an intensity not possible with any other form of illumination. Ultraviolet wavelengths are defined as beginning below 400nm, however, this laser operates at near 405nm in the deep violet. It is capable of causing a fluorescent reaction that is, for our purposes, equivalent to UV excitation.
Among the uses for this pointer are the preliminary separation of synthetic or high temperature, high pressure- (HPHT-) treated diamonds, cobalt treatment of corundum, and seeing the extent of filler in emeralds and other gems. Natural diamonds generally react with a blue-white fluorescence, while chemical vapour deposition (CVD) synthetic diamonds typically exhibit pink/pinkish-orange fluorescence. HPHT-grown and -treated diamonds usually display a yellowish-green fluorescence. While not conclusive, these fluorescent reactions to the laser can serve to separate stones that need to be tested more extensively. The ‘filler’ used in emeralds and ‘B’ jadeite often react differently from the background when excited by the laser. This can show the extent of ‘oiling’ in emeralds and can pinpoint jadeite that may need additional testing. I am enjoying my new high-tech toy and discovering more ways it can help me to better do my job.
Keeping up
 [6]
[6]Technology can be a wonderful thing, but sharing our knowledge with colleagues is the most important way we can raise the collective competency. The tiny selection of tips and tricks I’ve shared is likely ‘old news’ to many readers; however, if someone becomes a better gemmologist or appraiser as a result, then this article will have fulfilled my hopes. Often it seems that fear of losing a competitive advantage keeps us from disclosing our discoveries or teaching a ‘newbie’ the techniques that will speed their progress toward greater ability. Sometimes belonging to an organization with geographically dispersed membership can make the process less scary. Ultimately, however, we all benefit individually when the profession as a whole moves forward—an unskilled gemmologist/appraiser reflects poorly on us all. Please take the opportunity to share what you know with someone who may need assistance; you could also consider becoming a mentor or willing advisor to someone starting out. If we truly want to excel at our craft, learning and sharing knowledge must become a lifelong endeavour.
 [7]Mark T. Cartwright, ASA, ICGA, CSM-NAJA, GG (GIA), is president of The Gem Lab, I.C.G.A., an independent American Gem Society (AGS)-accredited gem laboratory. He has been a jewellery designer, goldsmith, gemmologist, and appraiser for more than a quarter century. Cartwright can be contacted via e-mail at gemlab@cox-internet.com[8].
- [Image]: http://www.jewellerybusiness.com/wp-content/uploads/2014/02/fiber-optic-tips.jpg
- [Image]: http://www.jewellerybusiness.com/wp-content/uploads/2014/02/emerald-cab-w-laser.jpg
- [Image]: http://www.jewellerybusiness.com/wp-content/uploads/2014/02/diamond-dark-field.jpg
- [Image]: http://www.jewellerybusiness.com/wp-content/uploads/2014/02/sapphire-with-fiber-optic.jpg
- [Image]: http://www.jewellerybusiness.com/wp-content/uploads/2014/02/diamond-with-wet-grading.jpg
- [Image]: http://www.jewellerybusiness.com/wp-content/uploads/2014/02/fiberoptic-reveals-devitrification.jpg
- [Image]: http://www.jewellerybusiness.com/wp-content/uploads/2014/12/Mark-Cartwright.jpg
- gemlab@cox-internet.com: mailto:gemlab@cox-internet.com
Source URL: https://www.jewellerybusiness.com/features/a-few-of-my-favourite-things-tools-that-may-make-your-job-easier/