Back to basics: A link in time
by charlene_voisin | August 1, 2012 9:00 am
By Tom Weishaar
 [1]
[1]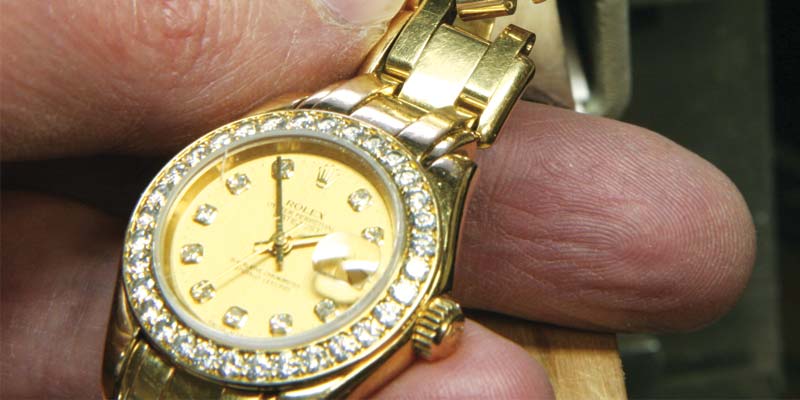 [2]
[2]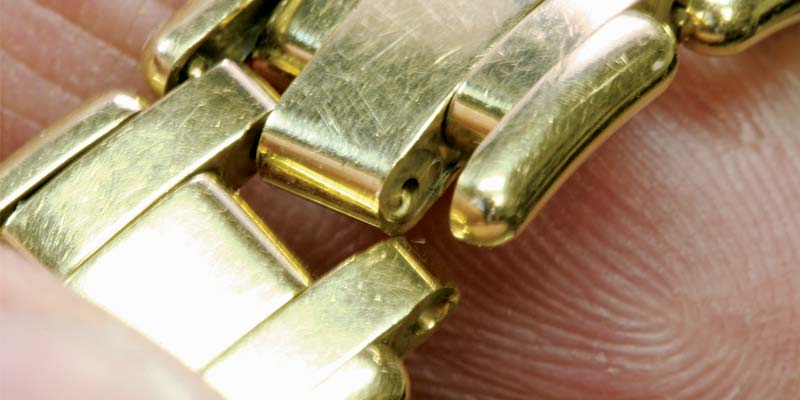 [3]
[3]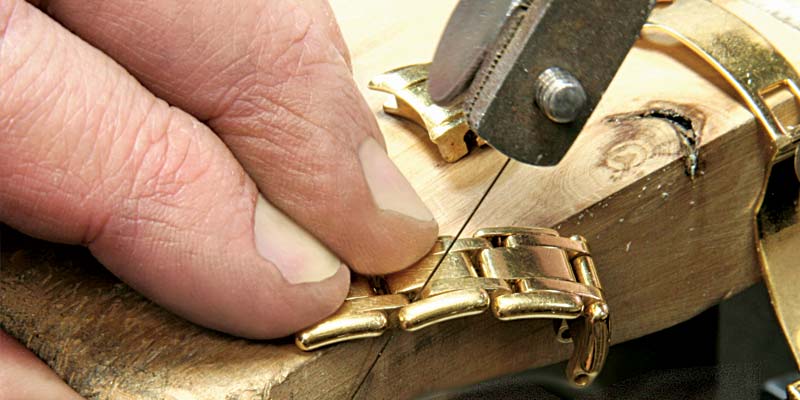 [4]
[4]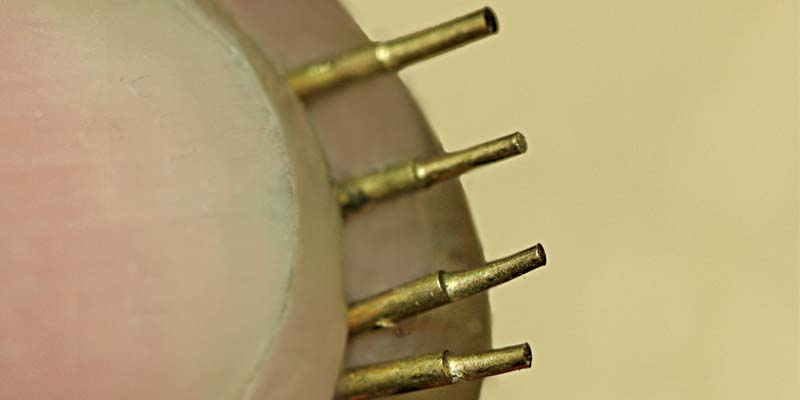 [5]
[5]


Editor’s Note: This is the fourth installment in a six-part series that aims to break bad habits and do away with shortcuts bench jewellers often pick up. This time, we turn our attention to rebuilding bracelet links.
Time takes its toll. Even the most beautiful and well-crafted piece has limits on its endurance. At 2200 years old, this beautiful Greek statue of Venus de Milo—also known as Aphrodite—has had her share of difficult days. No one can say at this point what has become of her arms. Perhaps they were lost through rough handling or some natural occurrence, but even without arms, her beauty is undeniable.
Even tanks need upkeep
Time and wear also take their toll on jewellery, even one of the most well-made watches in the world, Rolex.
Rolexes are sometimes compared with a well-made car, like a Rolls Royce. When bench jewellers discuss their durability, they use clichés such as ‘built like a tank.’ The ladies’ 18-karat Datejust (image two in the above slider) is 12 years old, and has been worn every day since its purchase. As you can see, the owner has taken good care of the watch and not worn it roughly. However, Rolexes are heavy watches, and the rivet wires holding the links together tend to receive the greatest wear.
Unfortunately, many watch bracelets come to me after they are worn down to the point where the links are eroded and repairing them becomes difficult and expensive. I am often asked to reconstruct links in men’s watches, along with the rivet wires. In the past, I have spent up to 40 hours rebuilding a single watch bracelet. In these situations, I think it would be best to replace the bracelet, rather than repair it. In the case of our example, the links still have good crisp edges—only the rivet wires need to be replaced.
In cases like this, I always discuss with the customer the options of repairing the single broken link or the better route of replacing all the rivets. Even though the remaining rivets are in place, it is a good assumption they are also worn and will fail soon. When done individually, the estimate at our store to repair a single rivet is $75 US. However, it is more cost-effective to repair all the rivets at the same time. Therefore, I reduce the estimate to $50 per link for a group rate. In our example, the customer chose to have all the rivets replaced for the reduced fee.
After receiving approval of the estimate, the first step was to cut the bracelet apart. I used an 8/0 saw blade and very carefully sliced through the rivets holding each of the links together. This watch was still so tightly connected, I had to drive small wooden wedges between a few of the links just to separate them enough to get the fine saw blade in between to do its job.
As can be seen in the last photo in the above slider, the remaining rivets were all worn down. The thickest of these rivets was about 50 per cent of its original diameter. It would have only been a short time before another rivet broke; with each break, you run the risk of losing the watch. This customer made the correct call in having all the rivets replaced.
 [6]
[6]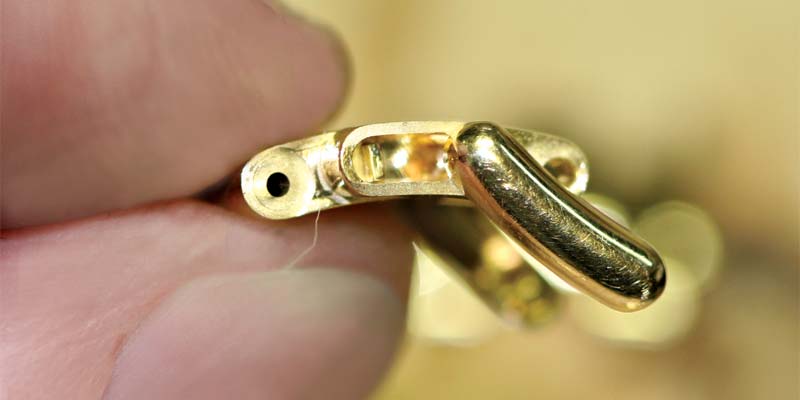 [7]
[7]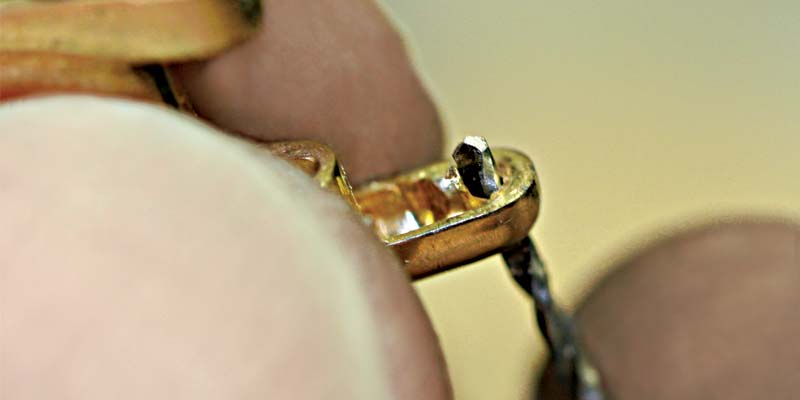 [8]
[8]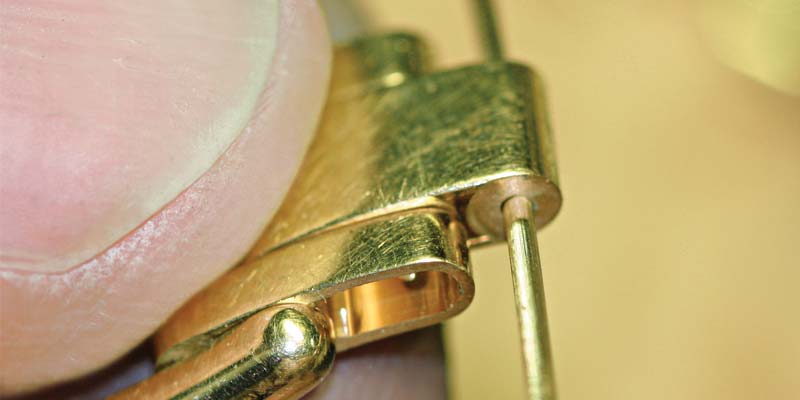 [9]
[9]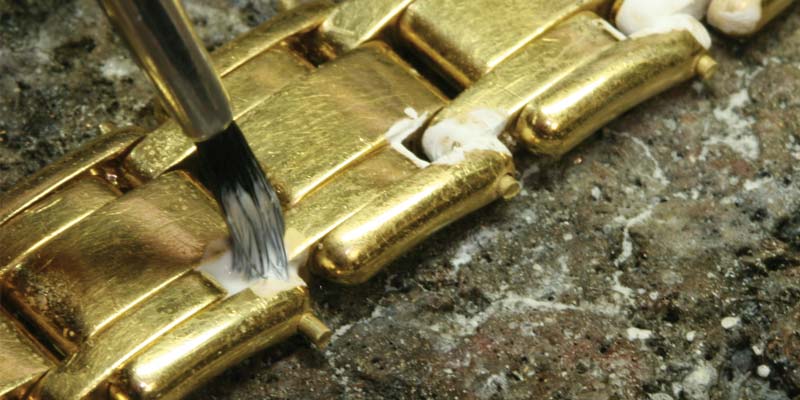 [10]
[10]


What lies beneath
I apologize if the first photo above is a bit gross, but it illustrates a point. This watch bracelet was cleaned prior to being cut apart. However, bracelets often have hidden compartments or small nooks that can be difficult to clean. Dirt and body oils can get trapped in areas around rivet wires or other moving parts, acting like sandpaper and wearing away these components. It is very important clients be made aware of the need to have their watches and jewellery professionally cleaned. In the case of a watch, the bracelet may need to be removed from the case and cleaned overnight or even boiled in a strong cleaner like ammonia or lye. This is not something customers can do on their own.
Great care must be taken when drilling out old rivet wires. This is an area where I sometimes see bench jewellers rush to get the job done. In the case of this Rolex, I had to find the exact location of the previous rivet and drill directly through it. Rolex does a great job in its manufacturing and you’ll likely not see pitted solder seams or other indicators of rivet locations.
I spent a good deal of time measuring with very sharp calipers to locate the centres of the old rivets. I also used a centre punch or small ball bur to make an indentation on the outside of the link. Doing so helps guide the drill bit and prevents it from wandering.
I prefer using a smaller bit first to drill a pilot hole and then follow up with the correct bit size. Drill bits must be sharpened on a whetstone or graver hone so they will cut cleanly. A dull drill bit can easily become bound in the metal and snap off. It can also leave an oversized, ragged hole, since the bit cannot effectively discharge the chips of cut metal.
A new rivet wire should fit the hole precisely. Rolex tends to use non-standard size wire for its rivets, which means I had to draw down a 1-mm wire to 0.92-mm for it to fit the hole correctly. Had I just grabbed a standard 18-gauge (0.80-mm) gold wire, there would have been a gap between the rivet and link. This would then become a new area where dirt could collect and wear down the new rivet wire even quicker than the old one. When working with nicely made jewellery, there is no room for sloppy work.
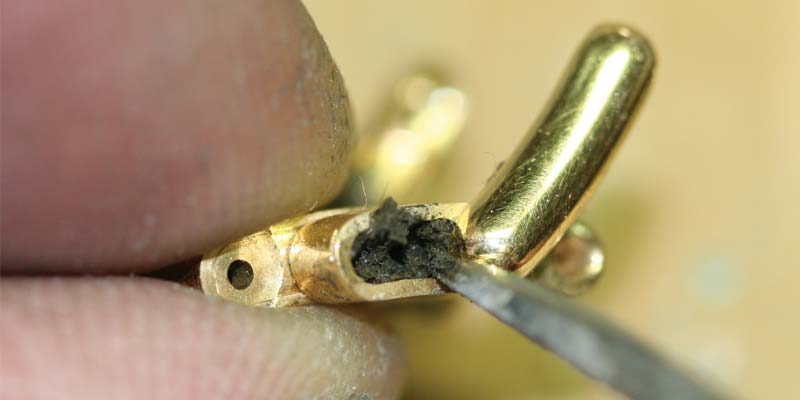
After all the rivet wires have been replaced, the next chore is soldering them to the outer links. This is a tightly fitted bracelet, with no spaces between the links. Soldering in situations like this can be problematic. As can be seen in the photo to the left, I’m using a mixture of white rouge powder and water to coat the space between the links prior to soldering. Solutions like this are called anti-solder. Used in extremely tight spaces, their job is to prevent molten solder from flowing down the rivet wire and soldering the outer and inner links together. To see how to make your own anti-solder paste, check out Tom’s Tool Tip[11].
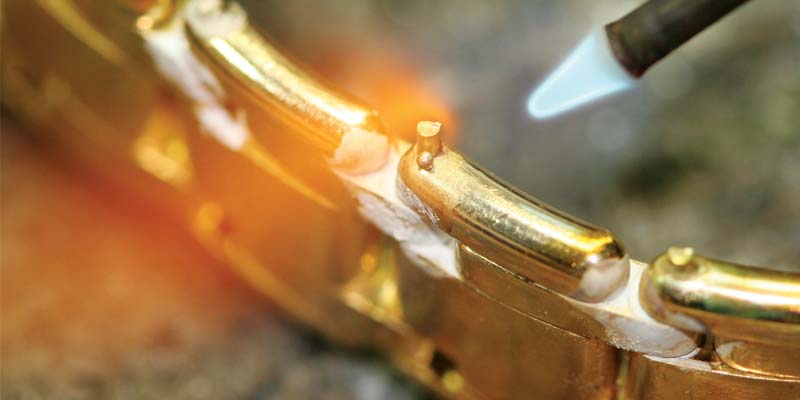
To solder the rivets in place, I used 18-karat yellow gold hard plumb solder. Use nothing but the best materials when repairing an expensive watch like this one. For this soldering job, I applied a rather large, neutral flame. Since there is a lot of gold mass in this bracelet, it required a large flame to bring the metal up to soldering temperature. When the bracelet was hot enough, I used a technique of wafting the flame back and forth over the rivet. This allows the heat to spread evenly into the mass of metal, preventing the gold from overheating and the solder from pooling in one area.
When working on large items, remember to not rush things and overheat the metal with an oxidizing flame. Aside from the strong chance of melting the metal, fire scale will also occur, causing the solder to flow erratically, boil, and pit. In short, you will have a serious mess on your hands.
This job turned out well, and my customer’s watch is ready for another 12 years or so of wear.
 [12]
[12]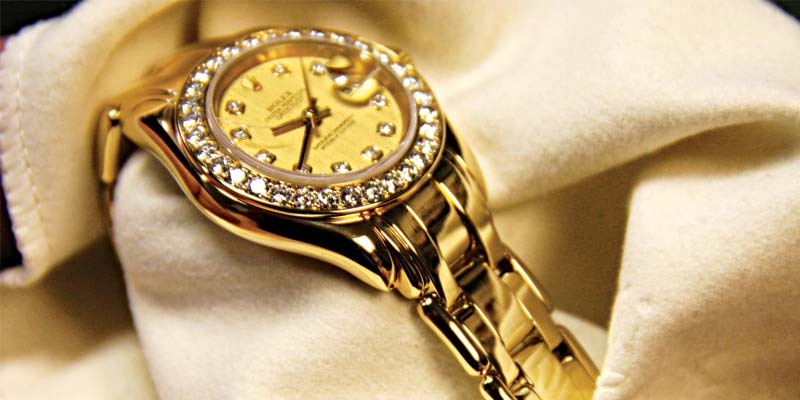 [13]
[13]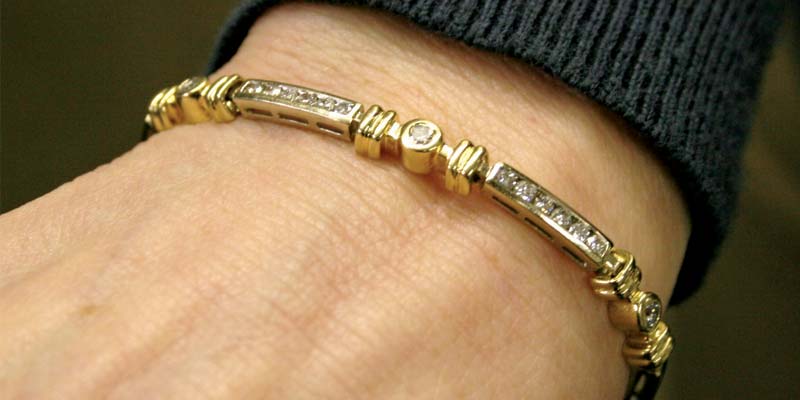 [14]
[14]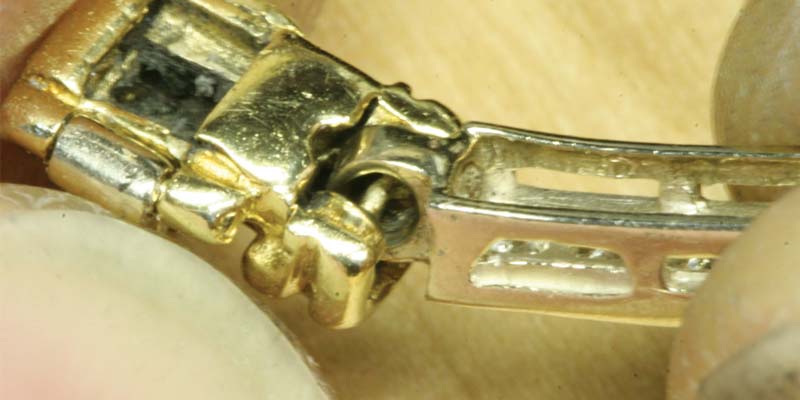 [15]
[15]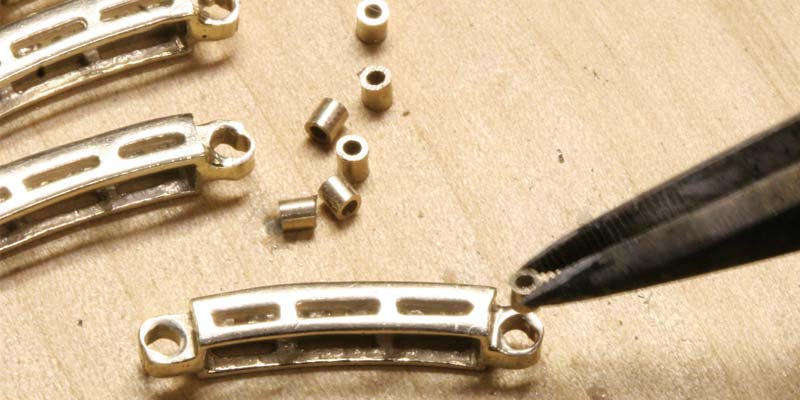 [16]
[16]


The missing link
The task of advising clients about repair work at our store usually falls on my shoulders. I try to develop good relationships with my customers so I can deliver both good and bad news. Sometimes, I even have to tell them they are not properly caring for their jewellery. The best advice I can offer clients on maintaining bracelet links is to keep them clean and get repairs done before significant wear occurs to the surrounding metal.
The second example we’ll look at is a more typical repair than the Rolex bracelet.
In our store, every customer who walks through the door is asked whether they would like to have their jewellery inspected and cleaned by the bench jeweller. While this policy does make it difficult at times for me to get my work done, it also allows me to see a lot of jewellery that normally never gets inspected. I often find potential problems and, in turn, this leads to some rather nice sales.
The bracelet seen in the third photo above looked great on the customer’s wrist, but under my microscope it was a different story.
When examining a customer’s jewellery, I use a microscope mounted on my bench. Normally, I find loose stones or worn prongs, but this time I found another problem. On first inspection, this bracelet was so dirty, I couldn’t even see the rivet wires holding the links together. The fourth photo above was taken after the bracelet was cleaned. As you can see, the rivet wire and its host tube are badly worn. Each link in this bracelet is in the same condition—they are all about to break. For situations like this, I have another microscope on the sales floor that is attached to a television monitor. I do a minimal cleaning on the piece and then show the customer what I’ve found. Most of the time, customers are not even aware a problem exists and the news often comes as a shock. I do not use hard-sell tactics when showing these types of problems to customers, hoping to drum up repair jobs. I prefer to talk about how I would handle the problem and the quality of my repair work. In this case, the woman chose to have the bracelet repaired.
I am a strong advocate of using a microscope and monitor for discussing repairs with potential customers. I call this practice ‘show them what you see,’ and it has generated hundreds of sales for my repair shop. The microscope and large monitor were an expensive investment for the store, but they have paid for themselves many times over. Frequently, I am also asked to show the completed repair work under the same system. Over the years, I’ve found I’ve become a better bench jeweller by showing customers ‘before and after’ examples of my work.
After cutting the bracelet apart, each link was fitted with a section of heavy-wall gold tubing. Note in the last photo above just how worn the old links are; more than 50 per cent of the original link is now gone. The new tubes will replace the worn metal, while the new rivet wires will slide smoothly, making this bracelet almost like new.
 [17]
[17]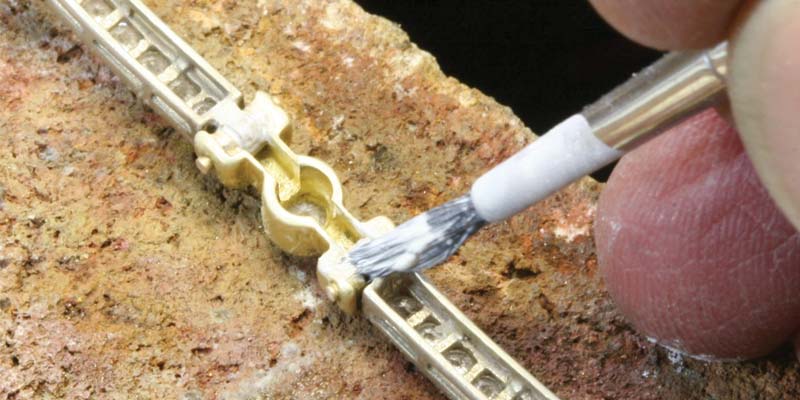 [18]
[18]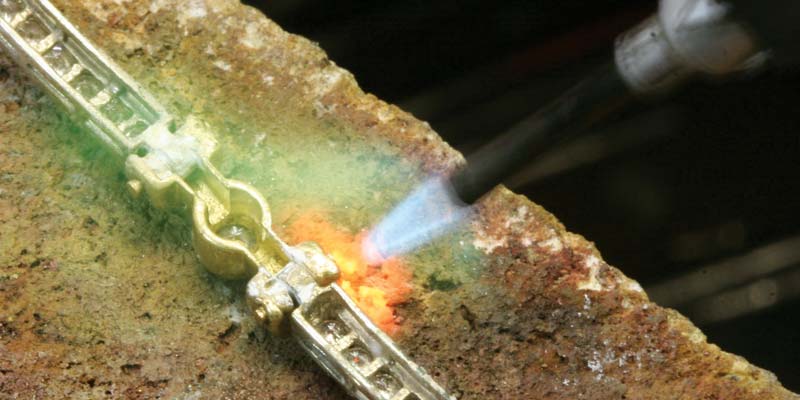 [19]
[19]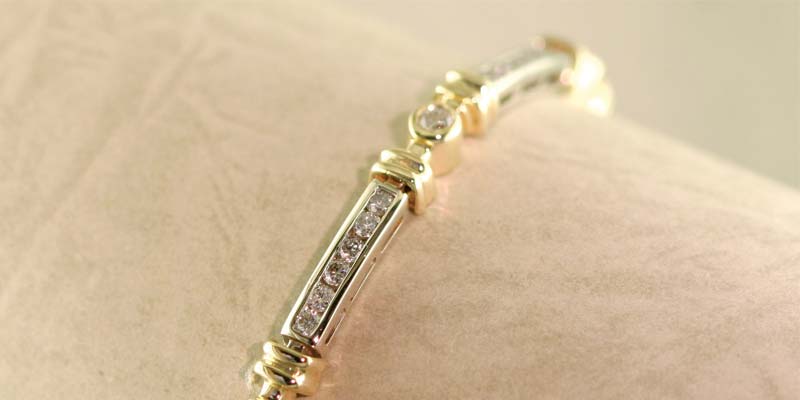 [20]
[20]


Fall in line
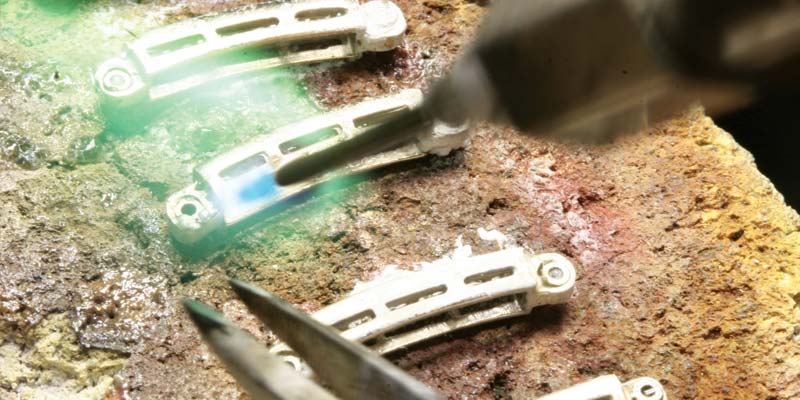
Since there were no other solder seams in the links for me to worry about, I was able to use 14-karat hard plumb solder to attach the new tubes to the old links. Having a little soldering assembly line helps speed things up. Repairing all the links at once allowed me to offer the customer a discount and cut down on the time spent doing the job.
After soldering all the new tubes, I drilled the old rivet wires out of the yellow gold cap ends and replaced them with new ones. Like the repair of the Rolex bracelet, I used anti-solder on this repair, too.
The anti-solder did a great job, preventing the new solder from flowing down into the links and freezing them. In this case, I used 14-karat easy-flow solder for attaching the new rivet wire to the end caps.
Repairing this diamond bracelet involved more soldering operations than the Rolex bracelet, but the work was less precise and faster to do. Cutting apart the bracelet was easy, as was drilling out the old rivets. Although it required adding new tubing inside the links, I estimated this job at $75 US per link. With 16 links to repair, the cost would have been $1200 if done separately. My customer chose to have all the links repaired at the same time, which cut the total labour in half and reduced the overall price to $800. It took four hours to complete this job and I used 2.5 dwt of 14-karat gold.
Repair jobs like these are understandably a bit of a shock for customers. When we purchase an expensive item like a diamond bracelet or a Rolex, we believe naively the item will last forever, neglecting to think about maintenance. However, these items do require repair work, which tends to start at around the 10-year mark of normal wear. Of course, repairs can be delayed somewhat through regular checkups and professional cleaning.
In the next column, we will look at repairing spring-type closures. If there is a topic you would like discussed, please send me an e-mail and I’ll do my best to include it in a future column.
 [21]Tom Weishaar is a certified master bench jeweller (CMBJ) and has presented seminars on jewellery repair topics for Jewelers of America (JA). He can be contacted via e-mail at tweishaar@cox.net[22].
- [Image]: http://www.jewellerybusiness.com/wp-content/uploads/2012/08/Link-Opener-B.jpg
- [Image]: http://www.jewellerybusiness.com/wp-content/uploads/2012/08/Link-02.jpg
- [Image]: http://www.jewellerybusiness.com/wp-content/uploads/2012/08/Link-03.jpg
- [Image]: http://www.jewellerybusiness.com/wp-content/uploads/2012/08/Link-04.jpg
- [Image]: http://www.jewellerybusiness.com/wp-content/uploads/2012/08/Link-05.jpg
- [Image]: http://www.jewellerybusiness.com/wp-content/uploads/2012/08/Link-06.jpg
- [Image]: http://www.jewellerybusiness.com/wp-content/uploads/2012/08/Link-07.jpg
- [Image]: http://www.jewellerybusiness.com/wp-content/uploads/2012/08/Link-09.jpg
- [Image]: http://www.jewellerybusiness.com/wp-content/uploads/2012/08/Link-10.jpg
- [Image]: http://www.jewellerybusiness.com/wp-content/uploads/2012/08/Link-11.jpg
- Tom’s Tool Tip: http://www.jewellerybusiness.com/?p=17342
- [Image]: http://www.jewellerybusiness.com/wp-content/uploads/2012/08/Link-12.jpg
- [Image]: http://www.jewellerybusiness.com/wp-content/uploads/2012/08/Link-14.jpg
- [Image]: http://www.jewellerybusiness.com/wp-content/uploads/2012/08/Link-16.jpg
- [Image]: http://www.jewellerybusiness.com/wp-content/uploads/2012/08/Link-17.jpg
- [Image]: http://www.jewellerybusiness.com/wp-content/uploads/2012/08/Link-18.jpg
- [Image]: http://www.jewellerybusiness.com/wp-content/uploads/2012/08/Link-19.jpg
- [Image]: http://www.jewellerybusiness.com/wp-content/uploads/2012/08/Link-20.jpg
- [Image]: http://www.jewellerybusiness.com/wp-content/uploads/2012/08/Link-21.jpg
- [Image]: http://www.jewellerybusiness.com/wp-content/uploads/2012/08/Link-22.jpg
- [Image]: http://www.jewellerybusiness.com/wp-content/uploads/2013/12/Tom-Weishaar.jpg
- tweishaar@cox.net: mailto:tweishaar@cox.net
Source URL: https://www.jewellerybusiness.com/features/back-to-basics-a-link-in-time/