Designing and working with 3D-printed fine jewellery
by Tamanna Bhasin | February 2, 2024 2:06 pm
By Christian Tse
More and more designers and bench jewellers are understanding the benefits of working with 3D printers, even on a small scale. The recent rise in 3D printing in fine jewellery manufacturing is expected to continue with compounding growth over the next decade. Much of this growth, at a CAGR of 13.50 per cent through 2030, will come from North America.1 The labour-saving and cost-effective nature of 3D printing allows jewellers to interact more with the creative aspects of fine jewellery manufacturing. For instance, chains can now be 3D-printed and cast without time-consuming labour—allowing designers to efficiently craft chains in-house instead of relying on manufactured goods.
Here are some lessons and helpful tips for jewellery creators experimenting with 3D printers.
Pre-assembled design
One of the most important steps in the process of 3D printing, whether making a mould or a finished piece of jewellery, is design. Designs must be made in Computer Aided Design (CAD) software in a way that anticipates 3D printing.
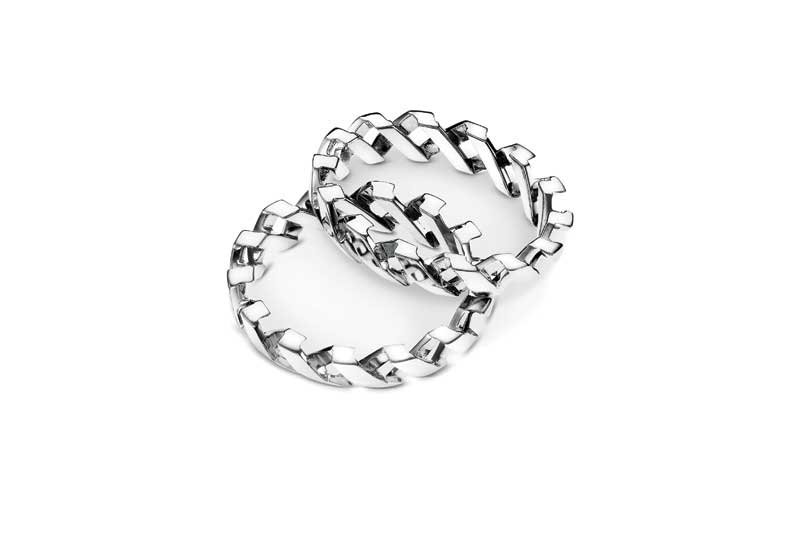
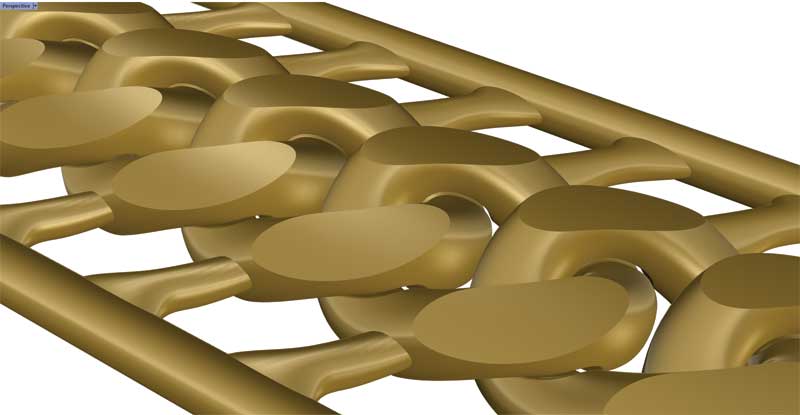
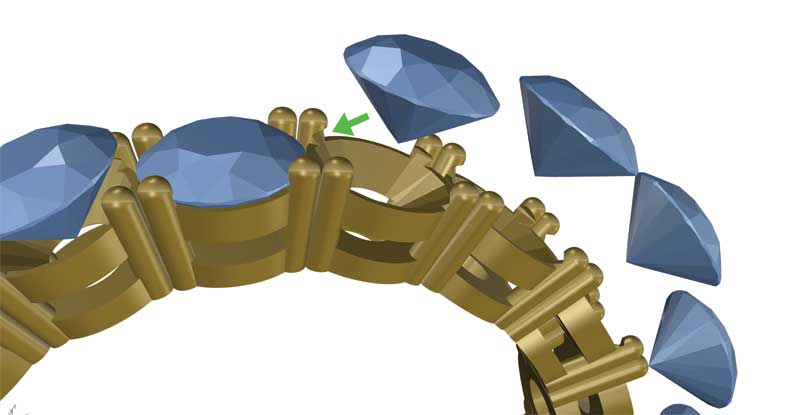
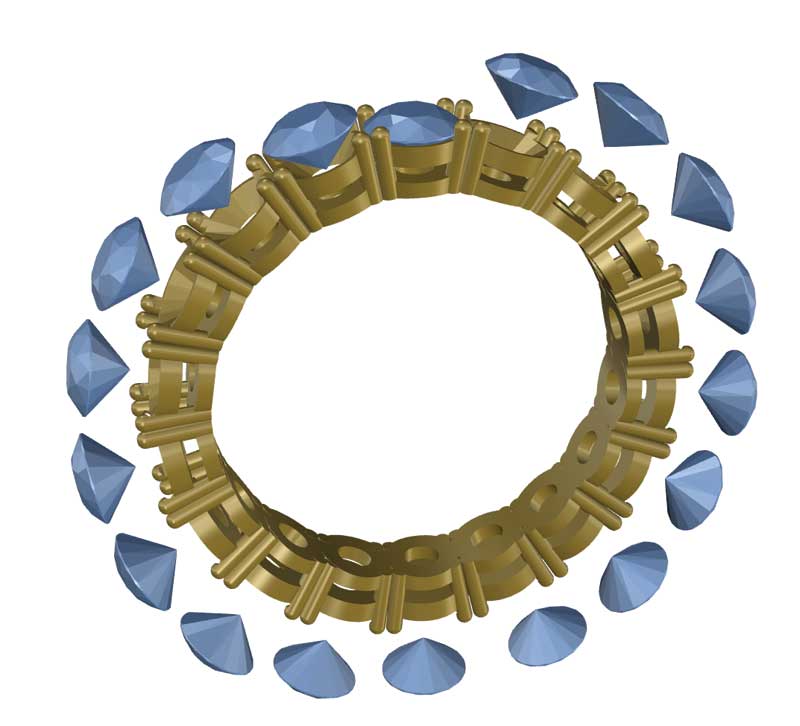
For example, a basic curb link chain would need to be designed in CAD as pre-assembled. Instead of the traditional way of drawing wires or individual pieces of chain, design as already assembled. The piece must be drawn so the sprues (the branch-like parts that attach components together for casting) are suspending each link of the chain “in air,” avoiding contact with the neighbouring link (Figure 1).
The space required between parts can vary, but it is important to allow enough room for the “poured investment” to flow into tight spaces. Poured investment refers to the water, silica, and gypsum that is mixed with waxes to form a mould. Molten metal is then poured into this mould for casting. Once you have casted, and the sprues are then cut, you are left with an assembled chain ready for polishing.
Using this type of CAD design with a 3D printer can literally save a jeweller two days’ worth of work, bypassing tedious labour. It also allows some flexibility for further creativity if the designer wants to add unique features or finishes.
Casting: Mixed metals, movement, and more
3D printing technology also allows for creative and profitable design choices, such as bi-metal casting at a time when mixed metal jewellery designs are on the rise. When 3D printing your mixed metal designs, it is important to carefully plan the casting process. First, you must cast the higher temperature metal and then later cast the metal with the lower melting temperature. For example, when casting platinum and gold, any portion of the design that includes platinum must be cast first, as it has a higher melting temperature than gold. Then, gold is cast. This allows you to 3D-print the mixed metal piece without a post-printing assembly process, saving time and effort.
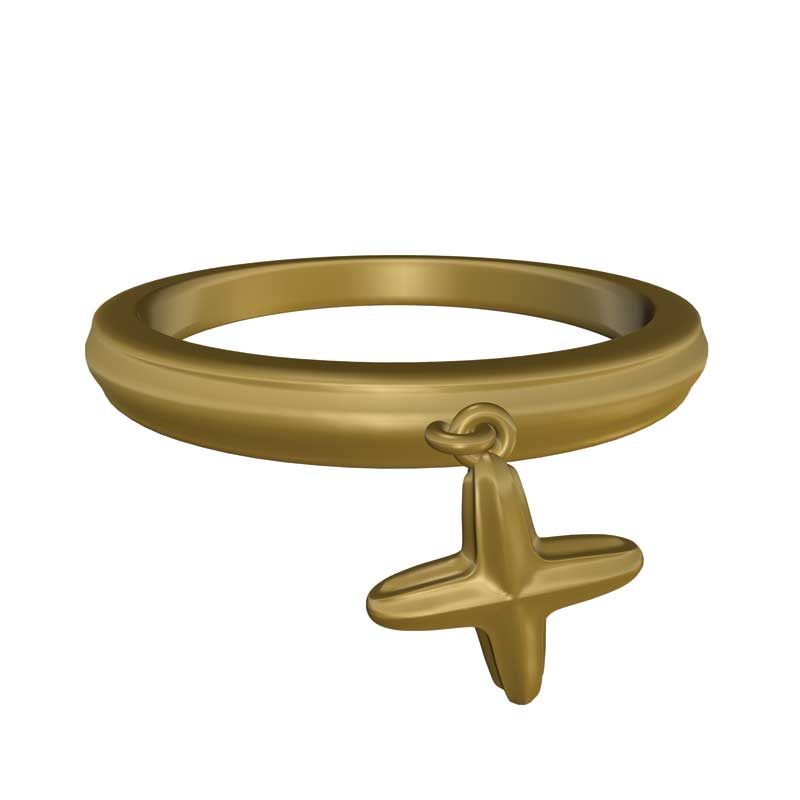
You can also cast a piece with a movable and flexible charm. Consider the process of casting a 3D-printed ring with a hanging charm. It is important the jump ring holding the charm on the ring does not touch the shank or any other jump rings. The sprues designed in CAD will hold it in place while it is being cast, suspending the charm away from the ring, shank, and jump rings. When the sprues are cut away after casting, the charm is free to move when worn.
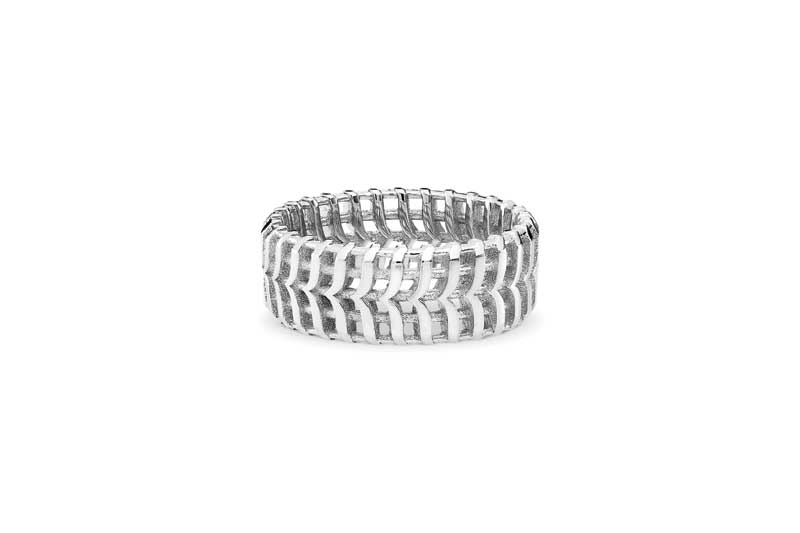
The same concept applies when designing tennis bracelets or bracelets, such as mesh, that need flexibility and movement. Sprues drawn in CAD hold the pieces in place when the bracelet is being cast, making sure they do not intersect. Then, when the sprues are cut afterwards, the piece has fluidity of movement.

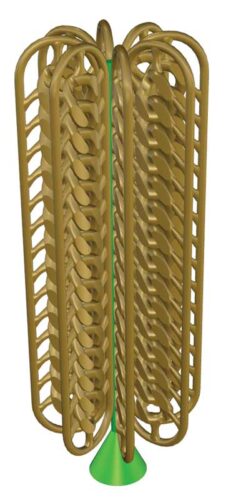
To experiment on your own, download a very simple Christian Tse design using the QR code (Figure 3). You can see how the design was drawn in CAD and try to modify it or print it on a 3D printer.
Stone-in-place casting
Stone-in-place casting is also now available through 3D printing. This method is a huge time saver within the jewellery making process. For instance, tennis bracelets that feature 1-mm diamonds can be very labour intensive when made by hand. Now, the diamonds can be placed into the wax for casting. The mountings are very secure because the metal forms around the stones when cast. Just remember to warm up the stone with light, so that the wax “melts” and secures the stone when it’s pushed into the prongs.
Alternatively, you can also design such a bracelet with a cut in the wax, to push the diamond into pre-formed prongs. The prong in your CAD drawing would have a little notch in the wax (Figures 5 and 6).
Finishing techniques
Different types of 3D printers lend themselves to different surface fineness after printing. The trick is to anticipate the resolution of your 3D printer. It requires a bit of trial and error, but once you get accustomed to your specific printer, you can anticipate its resolution when designing in CAD.
Regardless of the resolution of the printers, the polish of all the finished surfaces can be homogenized if a hands-off approach is implemented after the piece is cast. Specifically, employing electromagnetic polishing and ceramic vibratory polishing, or using both methods in succession.
Finishing textures can also be started in CAD. When working on textured or hammered gold surfaces, the surface bumps can be designed in CAD to achieve textured surface printing. You still have to finish the piece, but would be hammering about 15-20 per cent less. The finished piece will appear to have been worked entirely by hand.

Design for manufacturing
Instead of going against the grain by taking designs and trying to automate the manufacturing, “design for manufacturing.” In other words, design pieces to automate as much of the manufacturing as possible, proactively working with the automation systems that are already in place.
Imagine a 2-mm chain completely set with diamonds, no metal visible. If designed appropriately in CAD, the chain can completely be made by 3D printers and robotic polishers. This frees up time for jewellery artisans to focus on adding finishing touches and decorative elements, such as a pendant for the chain.
Old world craftsmanship meets modern jewellery technology
As time moves on, we can integrate newfound technical advances with traditional craftmanship to expand capacity, compensate for a shortage in workers, and increase turnaround. Convinced that such innovations cannot be an alternative to the handmade process, the old guard of the jewellery industry are hesitant to try new technologies. Yet, the integration of new technologies such as 3D printing does not replace old methods. It provides a new way of working with the old, a marriage rather than a divorce. The technology, when properly applied, could help you produce quality custom work. With an understanding of the 3D printing process, you can anticipate and creatively work with available technology, saving you time and money without compromising on quality.
Resources
1 https://finance.yahoo.com/news/3d-printed-jewellery-market-size-175100373.html#:~:text=GlobeNewswire-,3D%20Printed%20Jewellery%20Market%20Size%20Worth%20USD%2022751.13%20Million%20by,Data%20By%20Contrive%20Datum%20Insights
Christian Tse, founder and CEO of Christian Tse Design & Manufacturing (CTD&M), is an award-winning designer and disruptor. A third-generation jeweller, Tse launched his designer line in 1996 to the delight of celebrity fans, including Jennifer Lopez, Béyonce, Sarah Jessica Parker, and more. His facility in Southern California is at the forefront of fine jewellery innovation, continually pushing the creative boundaries of engineering with a team devoted to efficiency and excellence. For more, visit christiantse.com.
Source URL: https://www.jewellerybusiness.com/features/designing-and-working-with-3d-printed-fine-jewellery/