Ready, set, sparkle: Making a statement with stone settings
Upon closer examination

Phillip Youngman, a brilliant gem artist from California, is primarily known for his expertise in cutting coloured gemstones. A few years ago, he spent many months designing two signature diamond cuts—one round and the other square. Both shapes have relatively ‘normal’ pavilion facet design, but their crowns are a variation on the rose cut.
To the naked eye, the diamonds are beautiful and have incredible life and brilliance, but it is only when examined with a loupe or microscope that one can see really the intricate facet arrangement.
Our second example is a suite of coloured gems cut by Colorado’s Stephen Avery, another of the world’s premier gem cutters. Stephen rarely cuts standard stones, preferring instead to design new shapes and facet structures. One of his specialty cuts comprises crown facets that are actually multiple diamond shapes. But again, unless the gem is a large one, the significant details of its faceting are often lost when viewed without magnification.
The final example we will look at is a proprietary round diamond by Christopher Designs. I have one in my safe, and although I have not designed a specific piece of jewellery around it, I mention this stone because of its unique attributes. Featuring a multi-faceted crown, this cut comprises 12-fold symmetry and a girdle made of 12 straight line facets. While it appears as a very brilliant round diamond, again, the intricacy of the actual facet arrangement is not easily seen without magnification.
My technique for creating settings for these three distinctive fancy cuts is to first model the stones using CAD, a somewhat painstaking process requiring careful measurement of the relevant dimensions and arrangement of the individual gem’s facet pattern.
I start by drawing the stone’s outline, and then, using calipers and measuring scale in combination with a gem microscope, start building the gem model. I usually recreate the pavilion’s pattern, as well, but for these examples, it isn’t really necessary to be as particular about this, since the crown is the most distinctive feature and the design element on which I tend to concentrate.
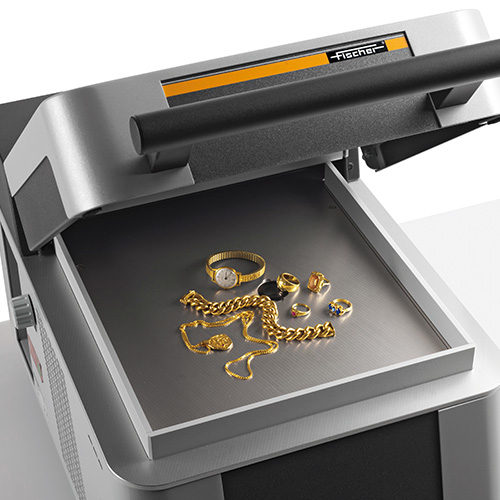
If you have access to a diamond cut grading machine, it is possible to scan a gem and create a file that can be imported into CAD. You will still need to work with a wire-frame model in the next steps, but this will at least cut down some of the tricky work of trying to measure individual facets. Alternatively, some gem cutters work with proprietary software to design their cuts and they may be able to provide a file to you.

Magnifying images of the actual facet patterns in a setting works well for pendant, earring, and brooch designs. However, the size of the diamond’s table is a factor to consider when designing rings. Stones with smaller tables in relation to the gem’s overall diameter prevent the diamond from filling up the entire table section of the magnified wire frame.
The size of the gem and the finished piece determines the next stage. To create our setting, we first enlarge the model in CAD to allow the finished piece to be large enough so that the facet patterns are easily visible. Phillip’s square cut has a small, central square table facet. At just over one carat in weight, the diamond I worked with was approximately a 6-mm square. Scaling the model up in 3-D until the dimensions of the table facet matched the size of the actual diamond resulted in a finished pendant that was a 30-mm square and large enough to clearly show the facet structure. As seen in the photo at the top of the page, the diamond became the table facet of the enlarged wire-frame pendant.
The four gems—spessartite garnet, aquamarine, and pink and green tourmaline—in Stephen’s colour suite are each 6 mm long. (See photos on page 4.) I purchased the suite at the Tucson Gem Fair and was then fortunate to find a strand of pastel multicoloured Chinese freshwater pearls to re-enforce the gems’ colours, inspiring a pendant/clasp design. Additionally, I found a large white South Sea pearl for the centre of the piece that contained all the colours of the rainbow in its purity. I decided to scale this wire frame much larger to provide spaces in which to float each of the gemstones.
Christopher Designs’ proprietary round cut has a similarly central table facet that follows the outline of the 12-sided girdle. The diamond I have is only .83-carats and just under 6 mm across. Since its table is smaller in proportion to its diameter than Phillip’s square cut, using the same scaling technique would only result in a form that was 12 mm across. This could be worn as a small pendant, but is perhaps better suited to become a ring or a pair of earrings.
One could make a larger wire frame suitable for a pendant, ‘floating’ the diamond in the centre of the piece (seen on page 1). This could perhaps be accomplished by using fine wire ‘spokes’ to support the stone, which would be set in either claws or a delicate rim bezel.
Sign up for our newsletter
Get all the latest news and features from Jewellery Business. Submit your email below to get our twice-monthly newsletter.
Read the Latest Issue
